
A listing is the record of one aircraft on Wingform. You create it once, and then everything else builds on it: you invite clients to it, publish it to buyers, create deals from it and track leads against it. This article walks through creating a listing, editing it later, and publishing it.
For finding, filtering and managing the listings you already have, see Managing Your Inventory.
Before you start
- You need a workspace with access to Inventory. If you work as a representative, your Authorized Executive or an Admin must allow you to create aircraft (the Create Aircraft Inventory and Deals permission, see Workspaces & Team Management).
- When you create a listing, you automatically get full access to it. Other team members see it only if they have access (see Managing Your Inventory).
Creating a listing
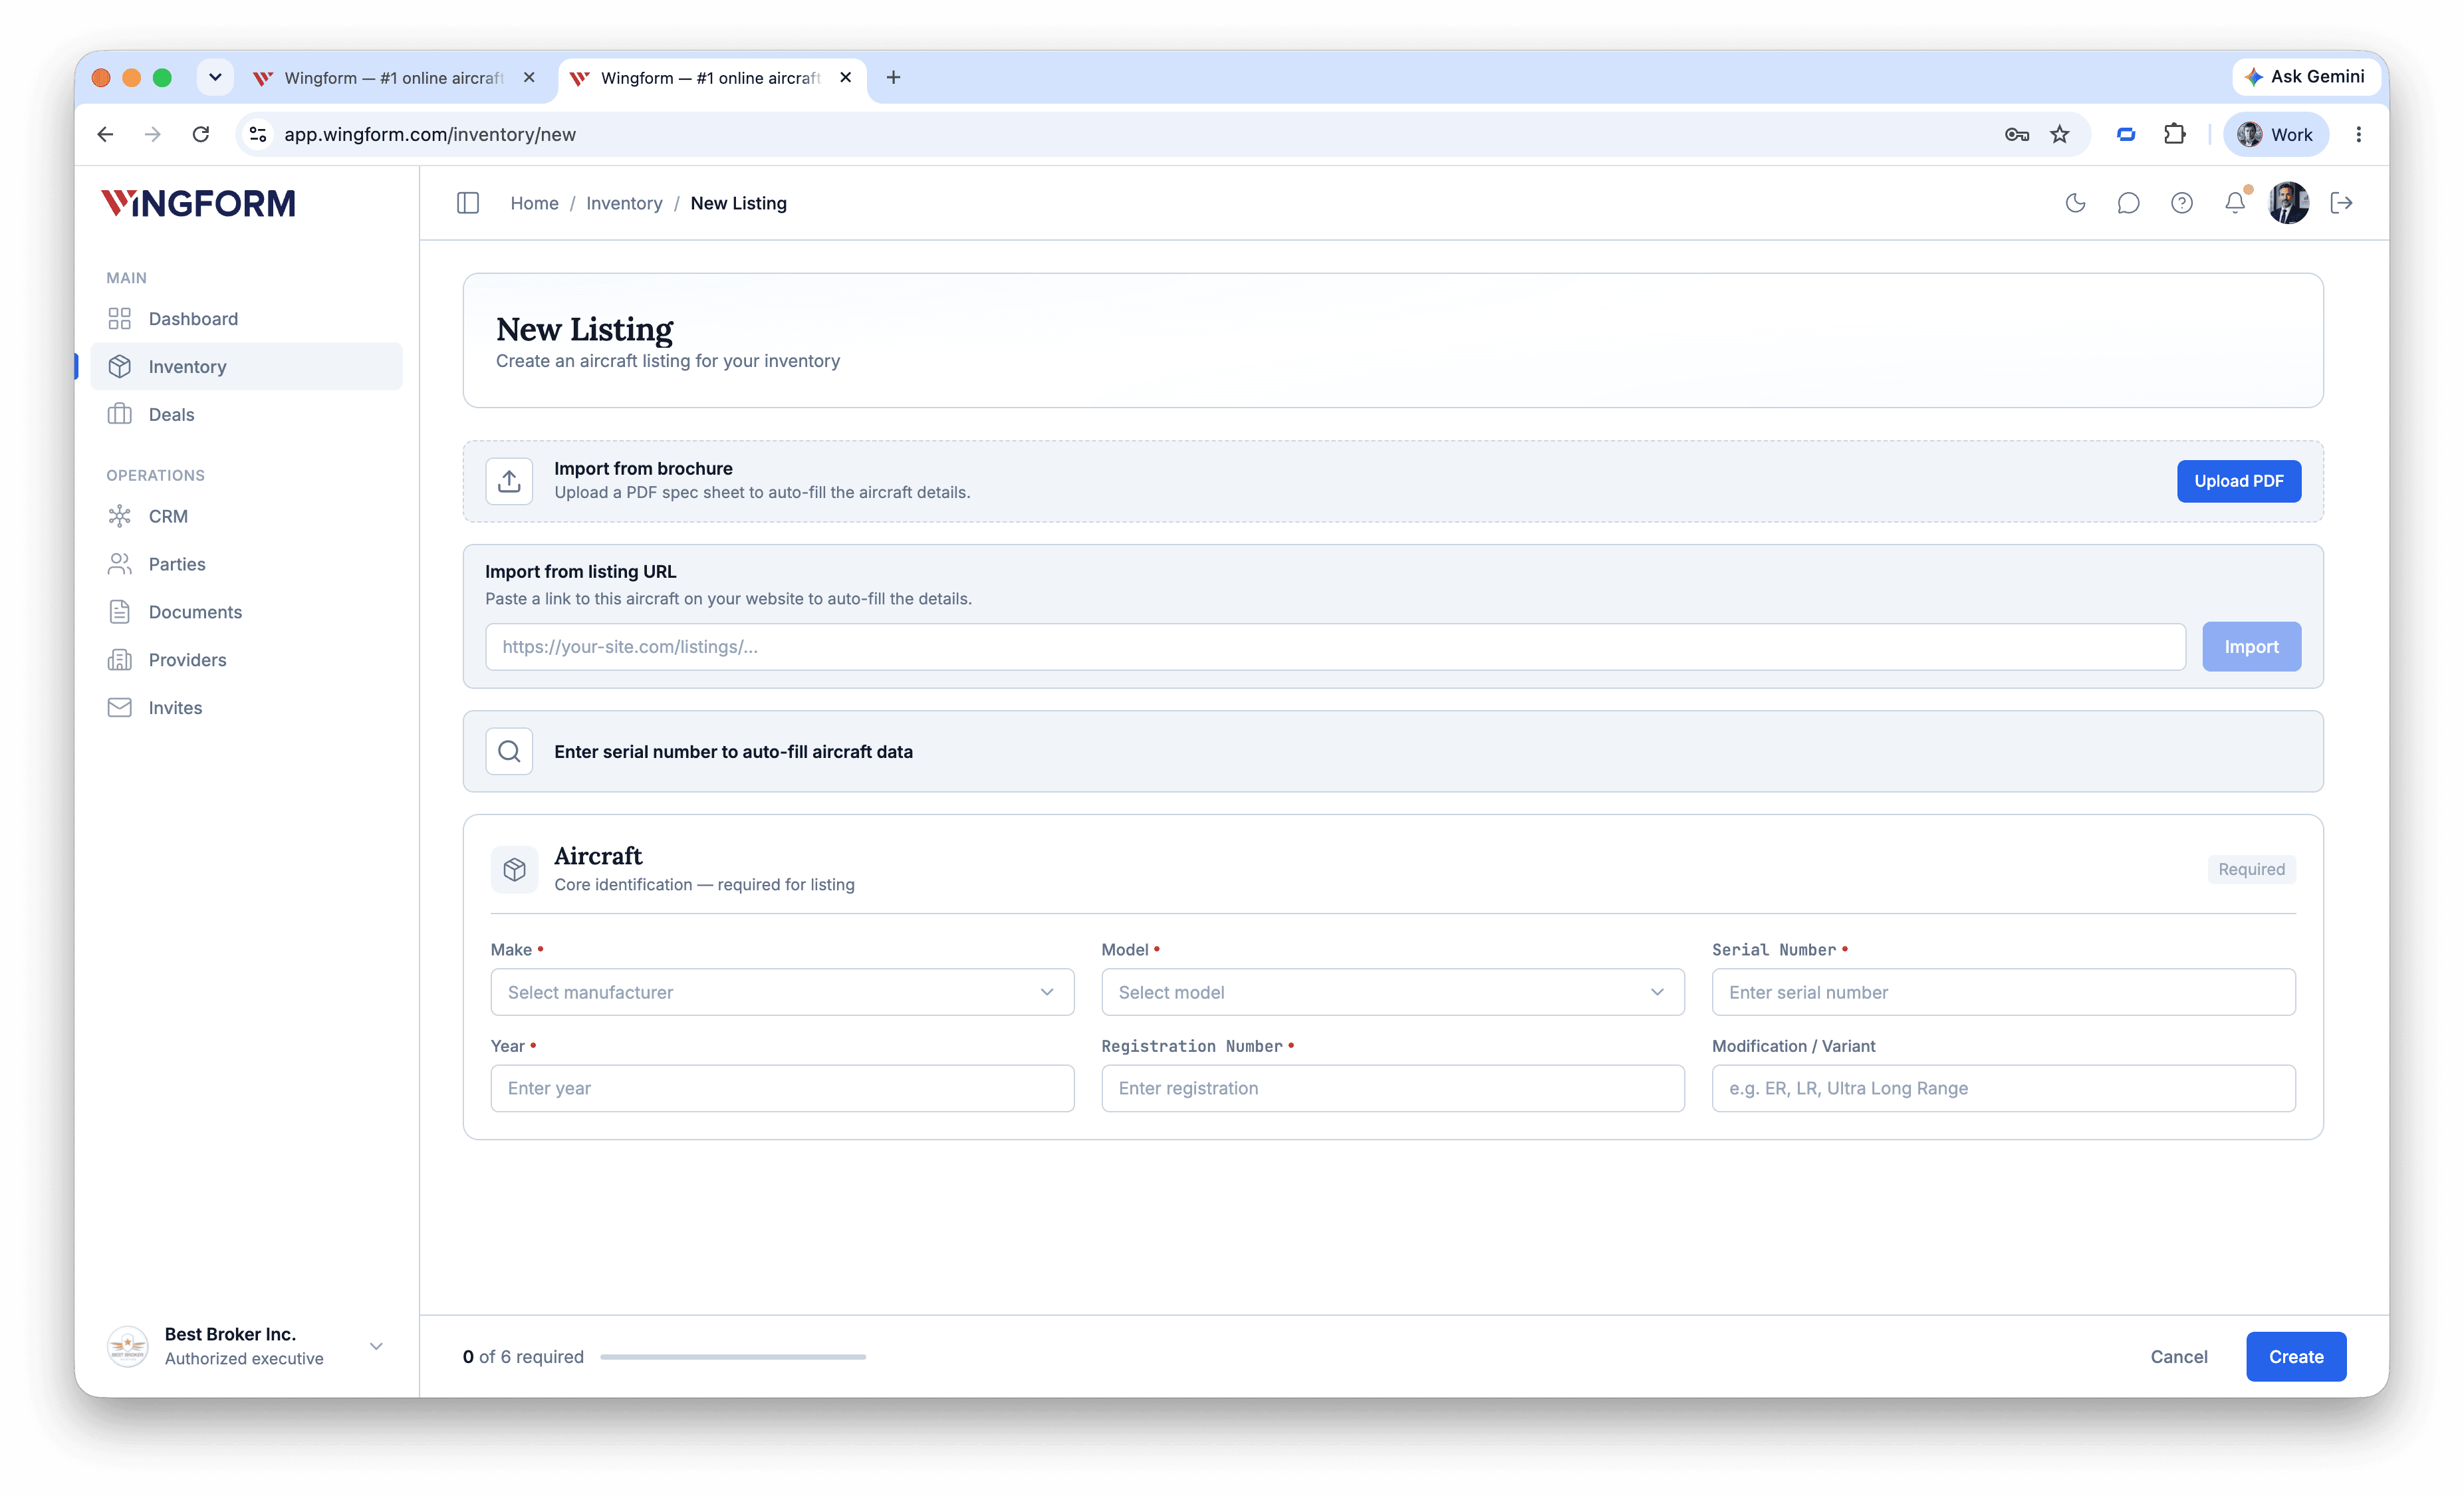
Open Inventory and select Add aircraft. The listing is a single page: all sections are visible at once, and the detailed specifications are collapsed until you open them.
Required details
The first section, Aircraft, holds the core identification. These fields are required:
| Field | Notes |
|---|---|
| Make | Choose the manufacturer from the list. |
| Model | Choose the model from the list. |
| Serial Number | |
| Year | A number from 1900 up to the current year. |
| Registration Number | |
| Country (in Location & Availability) | The country where the aircraft is based. |
The bar at the bottom of the page shows how many required fields are filled (for example, "4 of 6 required"). Modification / Variant (for example ER, LR, Ultra Long Range) is optional.
Fill the form faster
You do not have to type everything by hand. Three shortcuts sit at the top of the page:
- Auto-fill by serial number. For most jets and turboprops, enter the model and serial number and Wingform looks the aircraft up in JETNET data. The banner changes from "Enter serial number to auto-fill aircraft data" to "Fields auto-filled", and the specifications and photos can be brought in too. If the lookup fails, you can keep filling in the form manually.
- Import from listing URL. Paste the address of the aircraft's page on another website, and Wingform reads the specifications from it.
- Import from brochure. Upload a PDF brochure. Reading it can take up to a minute. Always review the auto-filled values before you publish: you are responsible for the final content.
If an import cannot read anything, you see a message and can try another page or file.
Location
Select the Country (required) and, if you know it, search for the Airport / Location. The airport is optional, so you can create a listing before the location is final. If you type an airport but do not pick it from the list, the form asks you to select one from the list.
Photos
Add up to 20 photos. The first photo becomes the cover image. You can crop each photo, and for jets and turboprops you can import photos from JETNET.
Description and documents
- Description — the aircraft's condition, history, notable features and recent upgrades. Up to 6,000 characters.
- Delivery Conditions — any specific delivery terms, warranties, programs or mutual agreements.
- Documents — attach supporting files. Each document needs a type; the form will not save until you choose one.
Detailed specifications
Open the collapsible groups to add technical detail: Summary (airframe, seats, flight rules and so on), Engines (up to four), Propeller, APU, Avionics, Maintenance, Exterior & Cabin and Features. A Weights group is shown to owners and operators and is hidden for brokers.
Where a field offers a list, you can also type your own value, so data that is not in our lists is kept rather than dropped.
Private details
The Private details section stores information only your side sees. Buyers never see it.
- Purchase price — what the aircraft was bought for.
- Target price — what you want for it.
- Currency for both prices.
- Link — the listing's page on your own website (must start with http:// or https://).
You can fill these in now or later from the listing's Notes tab (see Managing Your Inventory).
Saving
When the required fields are done, select Create. Select Cancel to leave without saving. After you create the listing, you return to Inventory, where the new aircraft appears.
Editing a listing
Open the listing and choose Edit Listing from the More actions menu. The same page opens, and the button reads Save.
If the aircraft is in a transaction, you can still edit its content, but the edit does not change its status: the listing stays tied to its active deal.
Practical notes
- Serial number, registration and year identify the aircraft. Check them before you publish, because buyers, deals and documents all read them from the listing.
- Prices in Private details are for you only. The price buyers see is the one you set when you publish.
- The same listing can be invited to different clients on different terms: see Aircraft Client Invitations.
- Auto-fill is a starting point. JETNET data and imported specifications can be incomplete or out of date, so read the result before you publish.